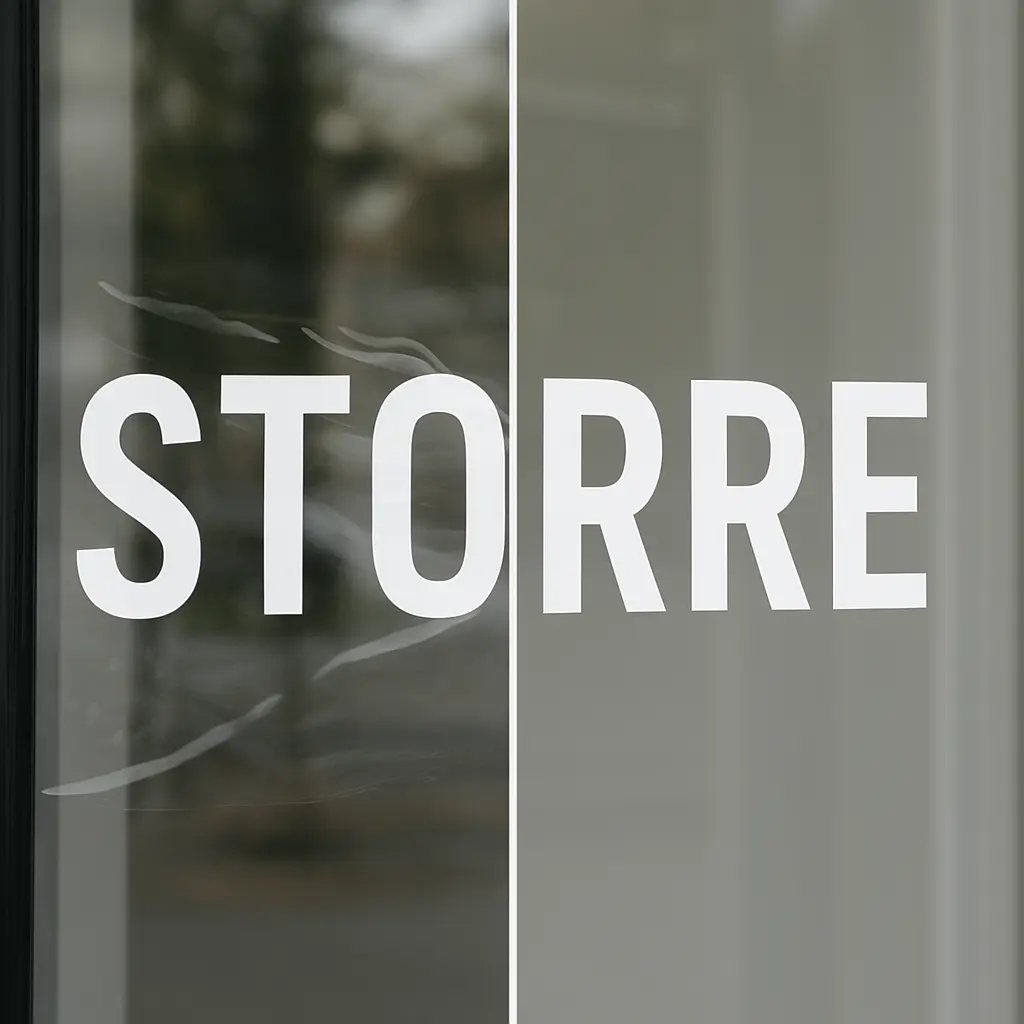
Apply a custom vinyl decal incorrectly and you’ll spend the next 15 minutes fighting bubbles, creases, and adhesive that refuses to cooperate. According to industry data from 3M, improper installation accounts for over 60% of premature decal failure. Whether you’re applying open hours decals to your storefront or vehicle lettering to your fleet, the difference between a professional look and a DIY disaster comes down to preparation and technique. Vinyl decal installation is a learnable skill that transforms your signage investment into a lasting brand asset.
Table of Contents
- Quick Takeaways
- Surface Preparation Determines Success
- Tools That Actually Matter
- Wet vs Dry Application Methods
- The Hinge Method for Large Decals
- Bubble Removal Techniques
- Temperature and Timing Considerations
- Frequently Asked Questions
- References
Quick Takeaways
| Key Insight | Explanation |
|---|---|
| Surface temperature matters more than air temperature | Vinyl adheres optimally when the surface is between 60-80°F, regardless of ambient conditions |
| Clean surfaces with isopropyl alcohol, not glass cleaner | Glass cleaners leave residue that prevents adhesion; 70% isopropyl alcohol evaporates completely |
| Wet application prevents bubbles on large decals | A light soapy water solution allows repositioning and eliminates air pockets during installation |
| Squeegee angle determines bubble formation | A 45-degree angle pushes air out effectively; too steep creates drag, too shallow traps air |
| Wait 24 hours before exposing to moisture | Adhesive requires full cure time before withstanding weather, washing, or condensation |
| Transfer tape removal speed prevents lifting | Pull back at a sharp angle slowly (180 degrees) to leave vinyl adhered, not on the tape |
| Professional-grade vinyl outperforms cheap alternatives by years | ORACAL® 651 lasts 6+ years outdoors; economy vinyl fails within 12-18 months |
Surface Preparation Determines Success
The adhesive bond between vinyl and substrate begins before you ever touch the decal. In practice, 80% of installation problems trace back to inadequate surface preparation. This isn’t about being meticulous for its own sake. It’s about creating the molecular contact that vinyl decal installation requires for long-term performance.
Start by cleaning the surface with 70% isopropyl alcohol and a lint-free cloth. Glass cleaners contain silicones and waxes that create an invisible barrier. These compounds don’t evaporate and they prevent adhesive contact. For textured surfaces like painted wood or stucco, use a brush to remove dust from crevices before wiping down.
Test surface porosity by applying a small piece of masking tape. If it doesn’t stick firmly, you’re dealing with a porous or contaminated substrate. Seal porous surfaces with a clear acrylic sealer 48 hours before vinyl application. For metal surfaces exposed to weather, check for oxidation. A white or chalky residue indicates surface deterioration that requires light sanding with 320-grit paper followed by alcohol cleaning.
Pro tip: Test your cleaning method on a small inconspicuous area first. Some plastics and painted surfaces react to alcohol by hazing or discoloring.
Tools That Actually Matter
You don’t need a professional installer’s toolkit, but three specific tools make the difference between frustration and success. A quality squeegee with a felt edge prevents scratching while providing the pressure needed for complete adhesion. Hard plastic squeegees work for flat applications, but felt edges are mandatory for textured or slightly curved surfaces.
A precision knife with fresh blades allows clean cuts without dragging or tearing. Dull blades pull vinyl instead of slicing through it cleanly. Replace your blade after every large project or when you feel any resistance during cuts. For detail work around letters or intricate designs, a weeding tool removes excess vinyl from transfer tape without damaging the design.
A spray bottle filled with application solution (3 drops dish soap per 16 oz water) enables wet application for decals larger than 12 inches. The solution must be very dilute. Too much soap prevents the adhesive from bonding properly. Mix it so lightly soapy that you barely see bubbles when shaking.
Optional but valuable: a heat gun or hair dryer for post-application smoothing. Heat activates adhesive and makes vinyl conform to curves and textures. Keep the heat source moving and maintain 6-8 inches of distance to avoid melting or warping.
Wet vs Dry Application Methods
The choice between wet and dry application isn’t a matter of preference. It’s determined by decal size, surface type, and your experience level. Dry application works for decals under 12 inches on flat surfaces. The vinyl adheres on contact, which means no repositioning but also no air bubbles if you work carefully from one edge across.
Wet application becomes necessary for decals larger than 12 inches or any installation on curved, textured, or vertical surfaces. The soapy water solution creates a temporary slip layer that prevents immediate adhesion. This gives you 30-60 seconds to position the decal correctly before squeegeeing out the liquid and air together.
| Application Method | Best For | Key Limitation |
|---|---|---|
| Dry Application | Small decals under 12 inches, flat surfaces, experienced installers | No repositioning possible once vinyl contacts surface |
| Wet Application | Large decals, vehicle graphics, window installations, first-time users | Requires 24-48 hour cure time before moisture exposure |
| Hinge Method (dry) | Medium decals 12-24 inches on flat surfaces | Demands precise alignment before starting |
A common mistake is using wet application for small decals on porous surfaces. The water saturates the substrate and prevents proper adhesion. For open hours decals on painted wood doors or textured glass, dry application with careful squeegee work produces better results.
Pro tip: For wet applications in cold weather, use room temperature water in your spray bottle. Cold water slows adhesive activation and extends cure time significantly.
The Hinge Method for Large Decals
The hinge method solves the biggest challenge in decal application tips: maintaining alignment while removing backing paper from large vinyl graphics. This technique creates a temporary anchor point that keeps your decal positioned correctly while you work from the center outward.
Position your decal exactly where you want it, using measuring tape to verify placement. Apply a strip of masking tape vertically down the center, adhering both the transfer tape and the surface below. This creates your hinge. Fold one half of the decal back along the hinge line, exposing the backing paper.
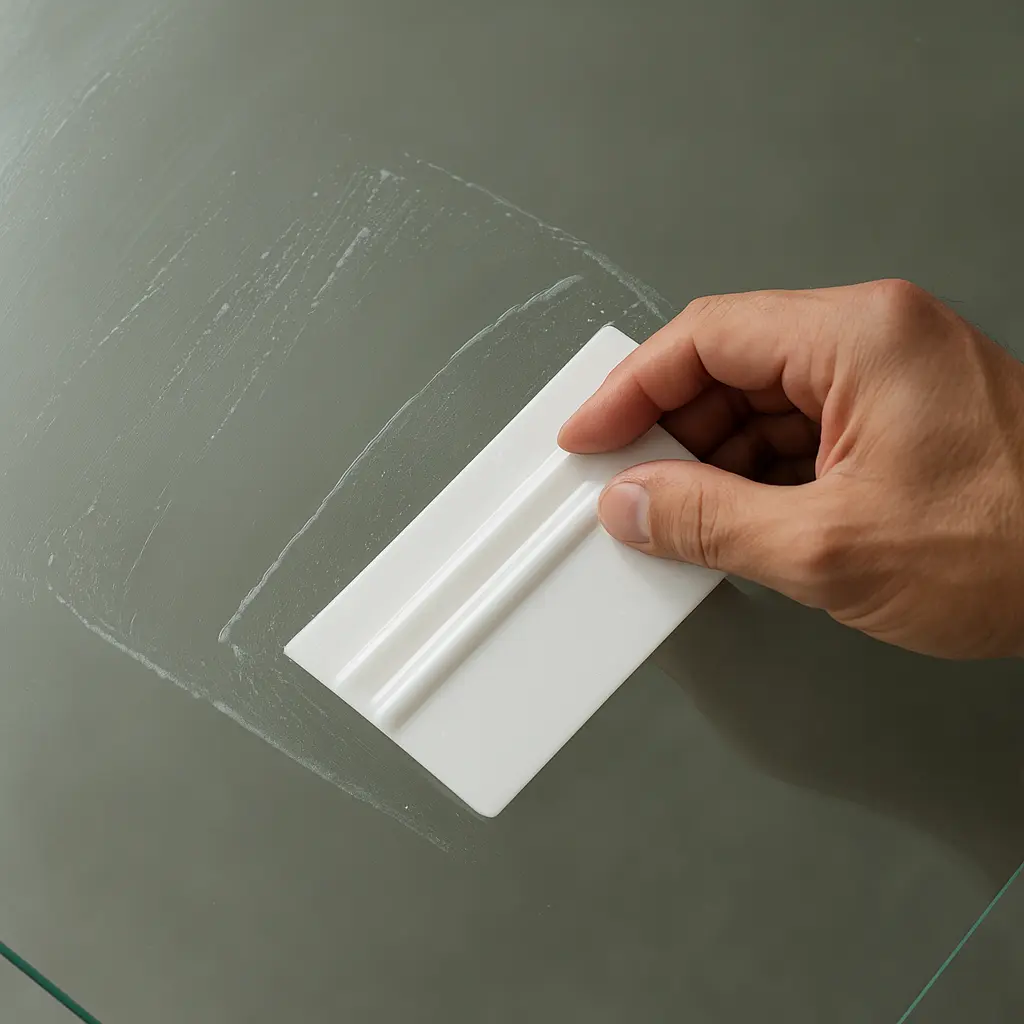
Peel the backing paper away from the vinyl at a sharp angle, pulling back on itself rather than straight down. This prevents the vinyl from lifting off the transfer tape. Once the backing is removed from one half, return the decal to position and squeegee from the center hinge outward to the edge. Work in overlapping strokes at a 45-degree angle, applying firm pressure.
Repeat the process for the second half. Remove the center hinge tape only after both sides are fully adhered. This method works exceptionally well for vehicle lettering, large window decals, and any application where misalignment means starting over with new material.
Bubble Removal Techniques
Despite perfect technique, small bubbles sometimes form during bubble-free vinyl application. The response depends on bubble size and timing. Bubbles smaller than 1/8 inch often disappear within 24-48 hours as adhesive cures and vinyl relaxes into place. Larger bubbles require intervention.
For bubbles caught immediately during installation, lift the vinyl carefully back to just beyond the bubble location. Smooth it down again with your squeegee, working from the lifted edge toward the bubble. The air will exit along the edge you just lifted. Never attempt to squeegee a bubble toward the center of a decal. You’ll only push it around without releasing it.
For bubbles discovered after the transfer tape is removed, use the pin prick method. Pierce the bubble center with a fine needle at a shallow angle. Press the vinyl flat with your thumb, forcing air out through the hole. The puncture is nearly invisible on matte vinyl and barely noticeable on gloss finishes. This technique works for bubbles up to 1/2 inch.
Large bubbles or those containing liquid (wet application) require partial removal and reapplication. There’s no shortcut. Attempting to squeeze liquid bubbles toward an edge often causes the vinyl to stretch or the adhesive to fail. Professional installers report that proper initial technique prevents 95% of bubble problems, making prevention far more efficient than correction.
The data from ORACAL’s technical documentation shows that adhesive achieves 50% of its ultimate bond strength in the first hour and reaches full strength after 72 hours at 70°F. Bubble correction becomes exponentially harder as this bond strengthens.
Temperature and Timing Considerations
Temperature affects every stage of vinyl decal installation, from adhesive activation to long-term durability. The ideal surface temperature range is 60-80°F. Below 50°F, adhesive doesn’t flow properly into surface irregularities. Above 90°F, adhesive becomes too aggressive and the vinyl may adhere before you’re ready.
Measure surface temperature, not air temperature. A black vehicle sitting in afternoon sun can reach 130°F even when the air temperature is only 75°F. Use an infrared thermometer or the back-of-your-hand test. If the surface feels hot to touch, it’s too hot for installation. Wait for shade or cooler conditions.
Cold weather installation requires adaptation. Warm the surface with a heat gun before cleaning and again just before applying vinyl. Keep your decals at room temperature until the moment of installation. Vinyl becomes stiff and brittle in cold conditions, making it difficult to work with and prone to cracking.
Timing matters after installation as well. Wait 24 hours before exposing decals to water or weather. This includes washing vehicles, cleaning windows, or allowing rain contact. The adhesive needs this cure time to reach working strength. For textured surfaces or porous substrates, extend this waiting period to 48 hours.
Professional-grade materials like ORACAL® 651 vinyl tolerate temperature variations better than economy vinyl. The polymer formulation and adhesive chemistry are engineered for outdoor durability. This translates to reliable installation across a wider temperature range and significantly longer lifespan once applied. Small business owners installing their own signage should prioritize material quality over cost savings. A $15 decal that lasts six years costs less per year than a $8 decal that fails after 18 months.
Frequently Asked Questions
How long should I wait before removing the transfer tape after applying vinyl?
Wait a minimum of 15 minutes for small decals and 30 minutes for large installations. This allows the adhesive to bond with the surface sufficiently that the vinyl stays in place rather than lifting off with the tape. In temperatures below 60°F, extend the waiting time to 45-60 minutes. The transfer tape should peel away smoothly at a sharp angle without any resistance. If you feel the vinyl trying to lift, stop and wait another 10 minutes before trying again.
Can I apply vinyl decals to freshly painted surfaces?
No, wait at least 30 days after painting before applying vinyl decals. Fresh paint continues to cure and release solvents during this period. Vinyl applied too early will trap these solvents, preventing proper paint curing and causing adhesive failure. The vinyl may initially appear to adhere correctly but will lift or bubble within weeks. For commercial storefronts and newly painted vehicles, plan your signage installation timeline accordingly. This waiting period applies to both latex and oil-based paints.
What causes vinyl decals to lift at the edges after installation?
Edge lifting results from four primary causes: inadequate surface cleaning, applying pressure only to the center during installation, exposure to moisture before the adhesive cures, or using vinyl on an incompatible surface. Always squeegee to the edges with firm pressure, ensuring complete contact. Seal edges on textured surfaces by running your squeegee or finger along them with extra pressure. For recurring problems, check that you’re using cast vinyl for curved surfaces rather than calendered vinyl, which lacks the conformability needed for anything beyond flat applications.
How do I remove air bubbles that appear days after installation?
Small bubbles that appear 24-48 hours after installation often indicate trapped moisture from wet application rather than air. These typically resolve on their own as the moisture evaporates through the vinyl. If bubbles persist after one week, use the pin prick method: pierce the bubble with a sterilized needle, press firmly to expel air or moisture, then apply heat with a hair dryer while smoothing the area. The heat reactivates the adhesive for a stronger bond. Bubbles larger than 1/4 inch that appear days later usually indicate adhesive failure and require decal replacement.
What’s the difference between cast and calendered vinyl for decal installation?
Cast vinyl is manufactured by pouring liquid polymer onto a sheet and allowing it to cure, creating a thin, conformable material that shrinks minimally over time. Calendered vinyl is made by processing the polymer through rollers, resulting in a thicker, less expensive material with higher shrinkage rates. For business signage on flat surfaces like windows, doors, and walls, calendered vinyl like ORACAL® 651 performs excellently and costs less. Reserve cast vinyl for vehicle wraps, compound curves, and applications requiring extreme conformability. The performance difference on flat surfaces doesn’t justify the cost premium of cast vinyl.
Can vinyl decals be applied in direct sunlight?
Direct sunlight creates two problems: excessive surface heat and accelerated adhesive activation. Surface temperatures in direct sun often exceed 100°F, causing the adhesive to bond too aggressively before you can position the decal correctly. The heat also makes the vinyl more elastic and prone to stretching. Schedule installations for early morning, late afternoon, or overcast conditions. If you must work in direct sun, create shade with a canopy or large cardboard and allow the surface to cool for 15-20 minutes before starting. Professional installers consistently report that controlled temperature conditions reduce installation time and improve results significantly.
How soon can I wash my vehicle after applying vinyl lettering?
Wait a full 48 hours before washing a vehicle with new vinyl graphics. Hand washing is safe after this period using pH-neutral car wash soap and soft cloths or mitts. Avoid automatic car washes with brushes for at least one week, as the mechanical action can catch decal edges before the adhesive reaches full strength. High-pressure washers require special caution. Keep the spray nozzle at least 12 inches from vinyl edges and never spray directly at an edge at close range. The 1500-3000 PSI pressure can force water under the vinyl and cause lifting. After the initial cure period, quality vinyl withstands normal vehicle washing for years without degradation.
What challenges have you encountered during vinyl decal installation, and which techniques helped you achieve professional results?